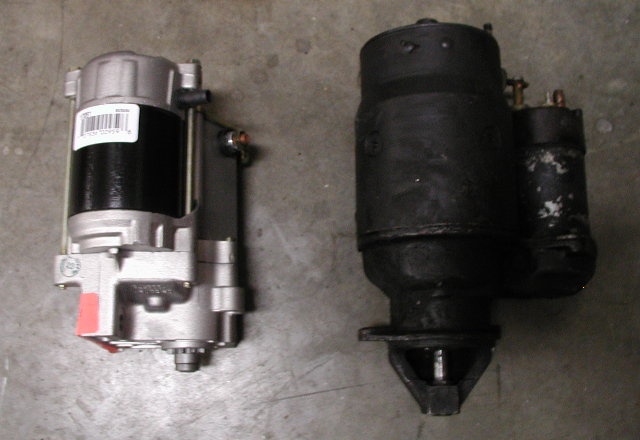
January 18, 2006 --- While I was pulling the old parts out the other day, I noticed that the old starter won't work with the new bellhousing. After doing some research, I found that the Advance bell housing requires a block mounted starter, so, new starter, here we come. Here is a pic of the old starter and the new gear reduction block mounted starter, a NAPA 6449S. My next step is to mount it up and get it aligned to the flywheel (a 168 tooth, 11" Chevy) and clearanced to the bellhousing. I'll post pics of that soon. No more time for Jeeps today. *NOTE - After a few experiments and two trips to the local Napa store, I discovered that though there are many starters that will fit, the only ones that line up the starter gear with the flywheel with an 11" clutch/flywheel have an offset mounting bolt pattern. Chevy small blocks have three starter mounting holes, but only two are used for any given starter. For a manual transmisson applicaton, the inline holes are used for 10 1/2" clutch/flywheels and the offset holes are used for 11" clutch/flywheels.
This page was last updated: March 8, 2006
Page is getting long again...time for page three
January 21, 2006 --- Spent the day today taking care of some housekeeping issues. While everything was apart I decided to replace my oil pan gasket and rear main seal as I have had a stubborn leak at the rear of the motor for a while. Since that is kind of off topic, I won't put my stuff up on it, but you can go to the Pavement Sucks website or the Jeepin website...they both have good pages on changing rear main seals and pan gaskets. Nothing but dirty work here.
January 25, 2006 --- Removed the old pilot bushing and installed the new one, installed the clutch and the bellhousing today. Also figured out the clutch slave and got that mounted up. Used a Raybestos SC38892. Still waiting for the transfer case.
February 1, 2006 --- Installed the transmission today. Once all the parts were togather it went in pretty easily. It physically fits in the Jeep without a problem (yeehaw!...I was having nightmares about cutting the floor up and having to build a new transmission hump). It does look like I may have a problem getting the transfer case to fit. I may have to clock it down or move my motor about an inch to one side.
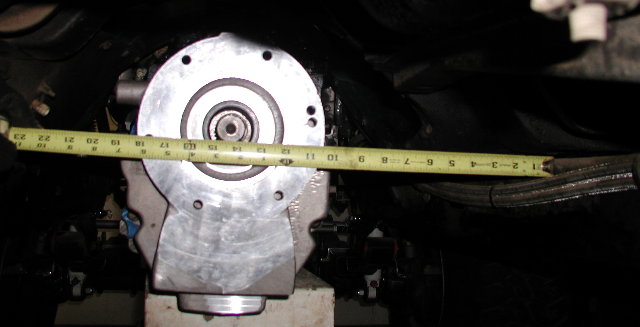
This shows the back of the trani at the output shaft. Note that it is 14 3/8" from the right side frame rail to the center of the output shaft. STaK says that their case is 14.56" from the center of the output to the right side edge of the case. It is scheduled to be here on the 7th, so I guess I will find out then how I am going to make it fit.
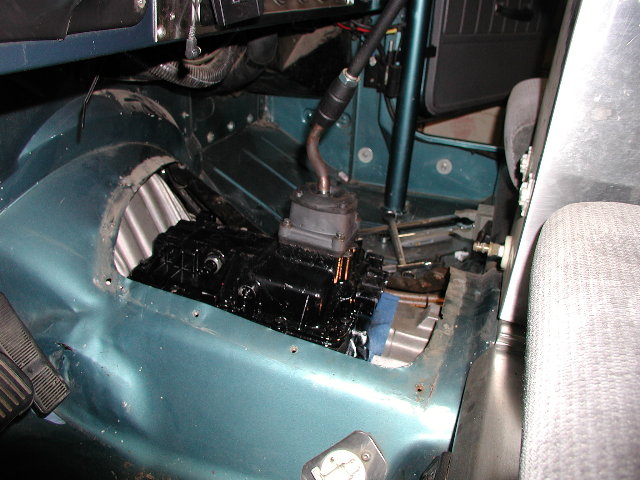
This is the NV4500 installed. As I mentioned, it will fit without trimming the floor
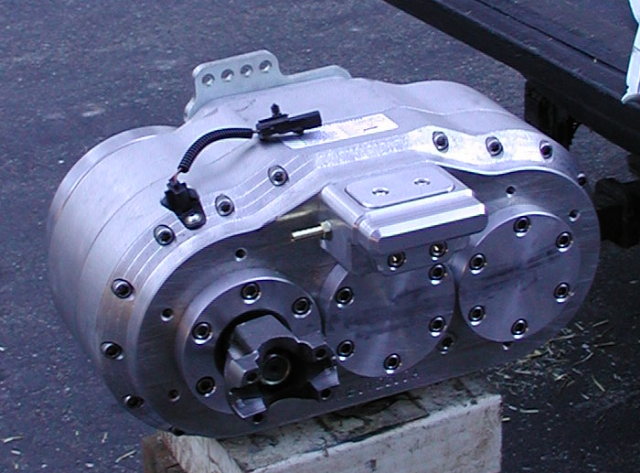
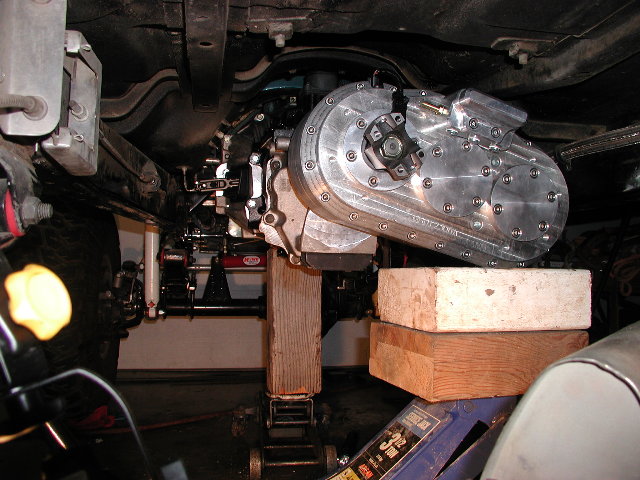
February 8th, 2006 --- Got the transfer case from the shipper today. It came well packed in a substantial crate and includes the shifter. Here it is fresh out of the box and waiting to get installed.
I put it on a floor jack and after some wrestling two of us got it up and in the Jeep. I clocked it down to give me some room and even then it misses the right frame rail by less than an inch. I didn't worry too much about clocking it down as I didn't tip it down any further than the bottom of the trans, so it didn't reduce my overall ground clearance. I won't have to move the motor, but will have to cut the floor and build a new transmission hump.
As you can see the t-case is very close to the right frame rail and is also touching the floor of the Jeep, and still needs to come up another two inches. Actually a large part of the problem is the shifter. As you can see from the top pic, it sits above the height of the case. It also won't work with the NV4500, I don't think. I am going to see if I can find a cable type shifter, or maybe fab up my own shifter that is mounted on trans instead of on the t-case.
February 10th, 2006 --- Started working on the t-case shifter today. After talking to Ken at STaK, he advised me that the shifter didn't need to be as long as it is, and that I should try to modify it to fit. He was real good about backing me up on it...told me to make an attempt and if I needed parts modified he would work with me on it. Great customer service attitude from these guys!
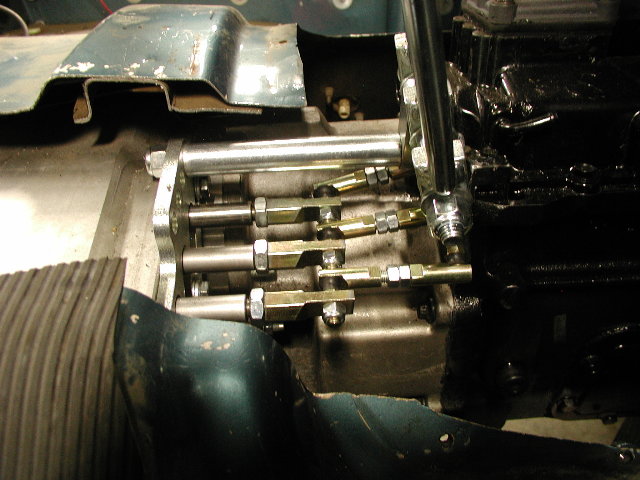
After some experimentation I cut the threaded rod for the shifter mount down to 8" (A) and the shifter mount tube (B) to 5 1/4". I also cut 1 1/8" off of each of the three shift rail attachment nuts (C, they still have 3/4" of threads, but I need to shorten them wherever I can), as well as removing the long adjustment hole on the opposite end of the nut (D), leaving only the short adjstment hole. I then shortened the link rods(E) to 1 3/4". This left them short, but also left some room for adjustment. On the shifter end, I used the shortest hole and cut off the tail of the shifter (F), so it wouldn't hit the transmission on full shift. So Ken was right, after cutting everything as short as I could it barely fit, but it does make it and shifts great.
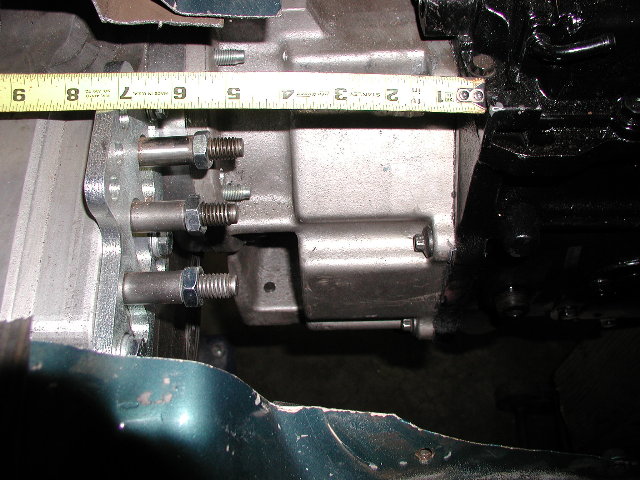
So here's a pic of the amount of room I have to work with between the t-case and the trans. I want to use all the room in order to put the shifter as far forward on the transmission hump as possible.
A --->
B
C
<---D
<---E
<---F
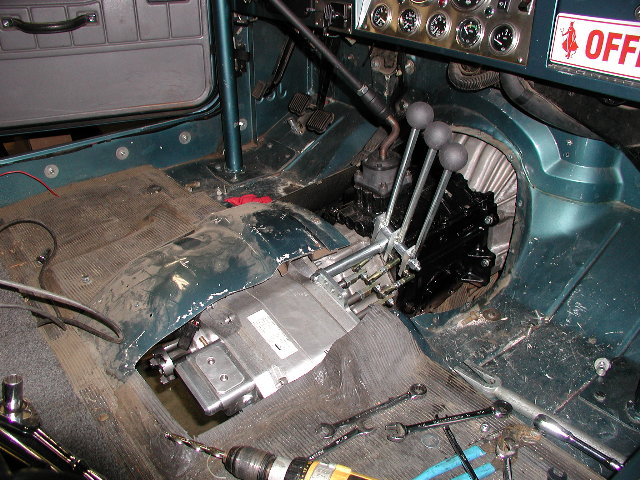
This shows the hole in the floor (I know, pretty substantial) that I had to cut in order to fit the t-case. Next on the list is to fab a new crossmember/trans mount and then fix this hole and re-install the seats.
February 24th, 2006 --- Next on the list is the crossmember. I wanted to do a very low profile cross member to try to keep the same ground clearance I had before the swap, even though the new trans and t-case do hang lower. The concept I was looking for was a DOM tube crossmember with a solid mount at the trans and poly mounts at each frame rail, similar to one I saw that Jeff Arabia had made. I don't have a tubing bender (though buying one is definitely on my radar) and Jeff's shop is a long trailer ride away, so I went to Bob Rogge in Diamond Springs and described what I wanted. He bent it up and it was installed within a few hours. From there, the Jeep was pushed across the alley to Casper's Muffler, where they re-installed the bulk of the old exhaust system with some new tubes to put the crossover in the correct place to match with the new trans length.
This is a pic of the underside of the Jeep showing the new tube crossmember and new exhaust work, after the crossmember was back from powdercoat (silver to match other powdercoating on the Jeep).
February 28th, 2006 --- Went and picked up the Jeep from Casper's today and trailered it back to the shop, where I removed the new crossmember and took it to the powder coater, TNT in Shigle Springs. Now that the height of the trans and t-case is set, I need to repair the floor and get the seats back in.
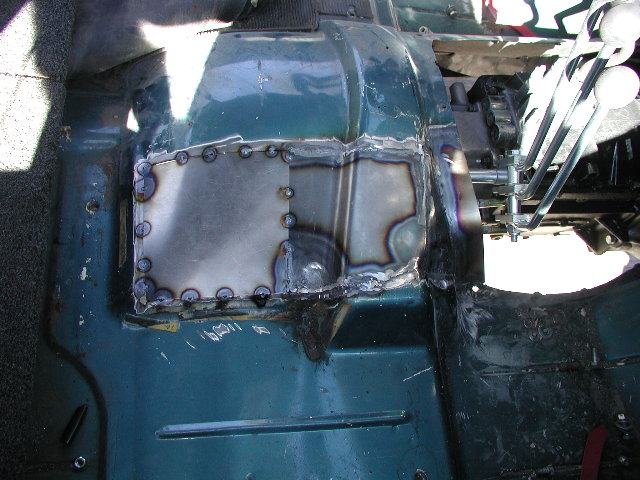
I started by piecing together 16 gauge sheet metal into panels that will clear the transfer case, accomodate a new transmission cover, and seal the floor. At this point the front two pieces are welded in, and the last piece is tacked in place. The plan is to finish welding it in place, do a light skim coat of body filler, some sanding, and cover it with Hippo-liner, a spray in bed liner type product I got from Ned's Auto Body in Vallejo.