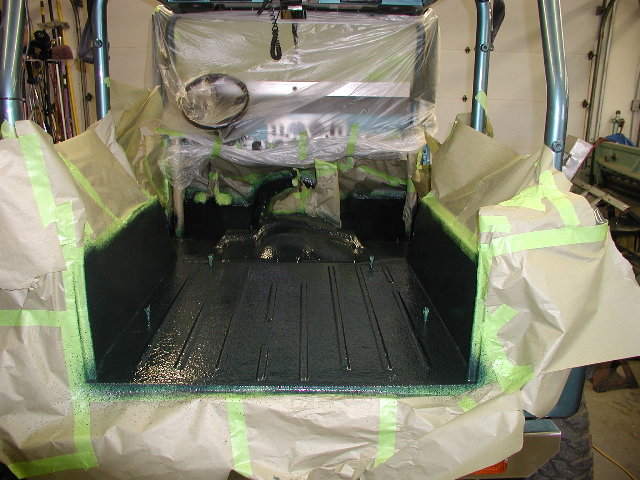
March 3rd, 2006 --- Been cold and snowy around here, so lots to do, plowing, etc. so I haven't worked on the jeep as much as I would like. Finished the floor work today, including the transmission cover. Then I masked and cleaned and shot the floor with Hippo-liner. Here are a couple of pics:
This is the interior stripped, masked, and shot with the new liner.
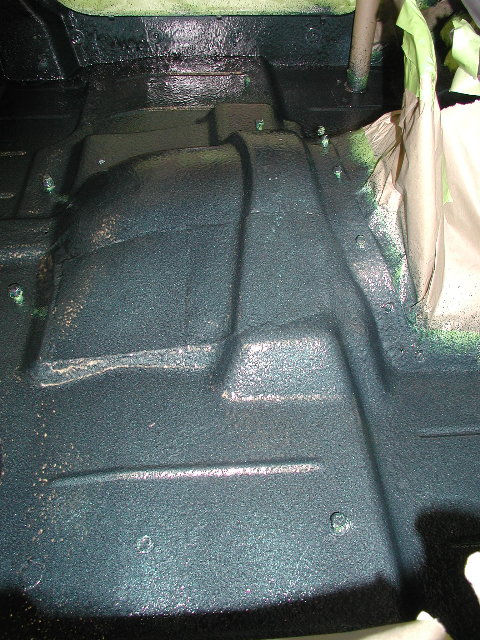
The transmission hump after the rebuild. In some areas the welds are obvious under the bedliner, but these are areas that will be covered by the seat box...only the area by the trans will actually show when the seats are in.
End
This page was last updated: August 27, 2006
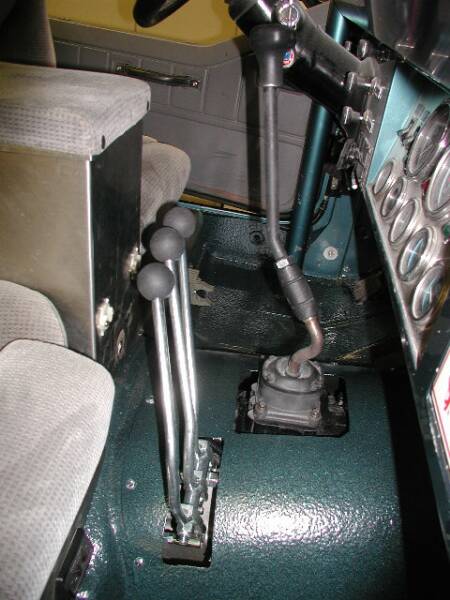
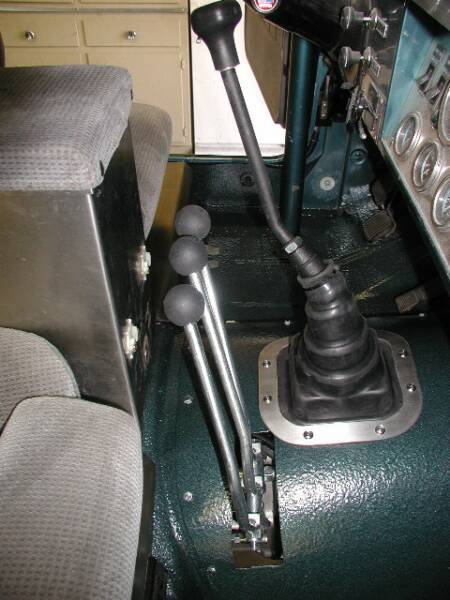
This is how it looks with the seats and trans cover in. And on the right after I put the transmission shifter boot on. It is a Dodge Ram 2500 NV4500 shifter boot that I trimmed the base of and made the brushed stainless bezel for from 14 gauge 304 stainless cut with a plasma cutter. STaK says they are trying to figure out a three stick boot for the t-case (something about tooling up to get it molded?), so I guess I will have to wait for that.
Next is figuring out the Vehicle Speed Sensor. I ordered a "Universal Speedometer Signal Interface" from Dakota Digital on someone's recommendation (can't remember who, maybe Ken at STaK?). It should be here in a few days, and that should be the next entry.
I also ordered a new rear end from Scott Arentz at Extreme Gear Off Road...a Dana 60 with an ARB air locker, Wilwood disc brakes, and Dutchman axles. This wouldn't be necessary for most folks because most CJ's have a centered rear end (to mate with a Dana 300), but mine is a bit older and was set up for the offset Dana 18 and requres a new, centered, rear end.
March 9th, 2006 --- Three feet of snow on the ground outside now and more coming. Been putting the interior back together, including some final cutting and bending on the gearshifts.
March 30th, 2006 --- Spent a few hours today wiring the VSS circuits. The following is a chart of how the connections were made:
SGI-5 connection
PWR
GROUND
GROUND
GROUND
Sig GROUND
Sig In
OUT 1
OUT 2
OUT 3
OUT 4
OUT 5
wire color
red
black
violet
black
black
brown
white
empty
yellow
empty
empty
green and orange
where?
tapped into pink/black of OEM chevy harness
from chassis ground
from chevrolet wiring harness, sensor ground for ECM
from speedo ground
from sensor ground on VSS
from signal from VSS
to speedo signal
to chevrolet wiring harness, signal to ECM
to +5 volts on VSS
notes
fused 3 amps
all GROUNDs tied together
fused 3 amps
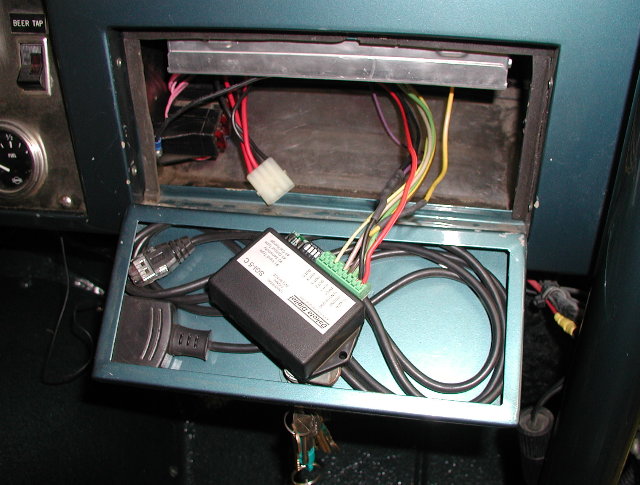
This is the SGI-5. To keep it dry and clean, I will clean up the wiring and remote mount it in the glove compartment next to the ECM (the silver box on the "ceiling" of the glove box).
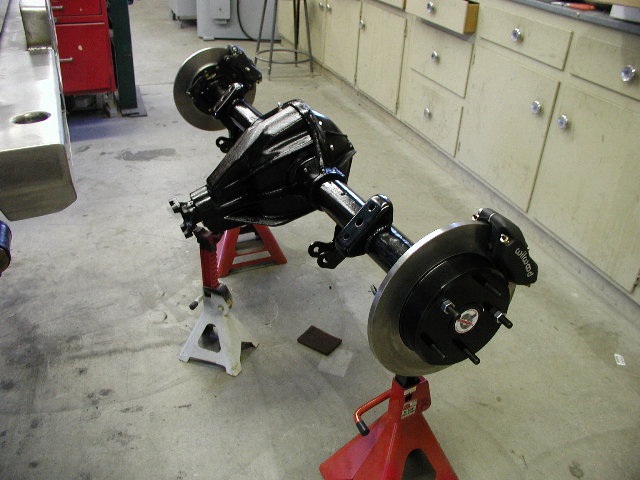
April 23rd, 2006 --- So I finally got my rearend set up and spent the day setting up spring perches and shock mounts, etc. I will put it in tomorrow and set up a time with Jesse from High Angle Driveline to build new drivelines for it. Here it is all ready to go in.
May 1st, 2006 --- Been talking to Jesse for a few days deciding what to do with the rear driveline. With the t-case tucked up as far as it is and the amount of lift I have, I really need a a high pinion rear end to acheive the angle I want for the driveline (Jesse says for a CV/double cardan style driveline, the angle at the double cardan joint should be less than 24 degrees...mine was about 25 degrees as set up...I should have paid more attention to it during the build). So I dropped the rear end at the shackle by 1" (which actually leveled out the Jeep some) and moved the rear end back at the spring by 1". It changed my stance a little, which actually looks better, I think, and it gave me a 23 degree driveshaft angle. The downside is I will have to do a little work to the fuel tank to make it fit (with the rear end moved back, it is a little too close to the tank at full compression). No matter, it is a custom stainless tank that I have worked on before. I will simply pull it out and change its shape a bit and it'll work great.
So, I ordered driveshafts today...a 1350 CV shaft for the rear and a 1310 CV shaft for the front. They should be here in a week or so.
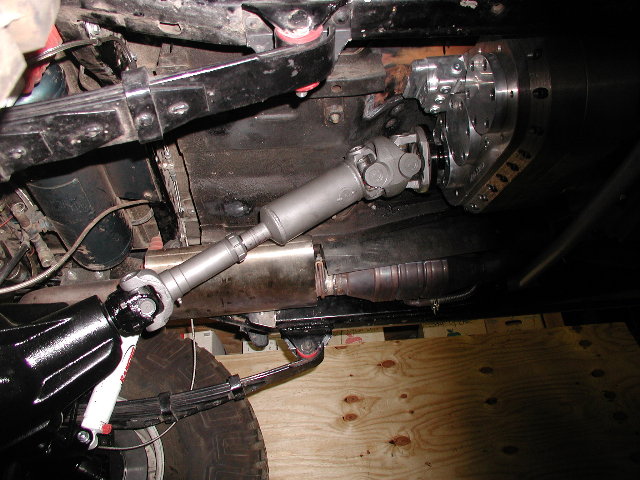
May 15th, 2006 --- Got the new CV shafts installed (finally). When I got them from Jesse at High Angle Driveline, I realized just how massive they are...HUGE!
August 27th, 2006 --- So what happened to this build for the last three months? Well, I finished it and went wheeling! Since June it has been on several road trips and in and out of the Rubicon four times. It has been trouble free and worked really very well.
I have driven it on the road locally in town as well as up to Lake Tahoe and back and on the freeways in the Sacramento valley. The NV4500 is perfect for this. In the mountains it pulls comfortably using 3rd and 4th most of the time. Once I am on the freeway on the flat or downhill, 70 mph is perfect in 5th gear, so that is pretty useful for me as well.
Off road, the gear ratios are very useful. I have found that when rock crawling, I keep the t-case in 5-low. This allows use of 2nd gear when crawling most of the time, 3rd gear for the easier crawling, and 4th and 5th for driving between the hard stuff. 3-low is great for easy trail riding. I use 2nd and 3rd a lot, and occasionally use 1st when I get to a harder spot. 1st in 3-low is between 2nd and 3rd in 5-low, for what it's worth. I am not a big sand dune fan, but I can imagine the 3-low would work very well for that in a multi-use kind of Jeep.